Friday, 11 October 2013

Apple and Bramble crumble cake

I was visiting my mother in law's allotment a month or so ago and was amazed at just how many blackberries she had growing there. I borrowed a tub from her and filled it with the intention of making some lovely seasonal bakes.

Something that I've always loved is crumble, served with custard though, not ice cream!
Though, it wouldn't have been very exciting just making a crumble and telling you all about it so I had a go at something a bit different that I found after a quick search around the Internet.

This crumble has a cinnamon sponge base, apple and blackberry filling and crumble topping. It looks impressive and smells amazing while it's in the oven.

For the sponge base:

150g caster sugar
3 large eggs
75g S/R flour

1/2 teaspoon of cinnamon 


Fruit filling:

2 cooking apples, peeled and chopped.
150g blackberries

For the crumble topping:

100g unsalted butter
100g Demerara sugar
1/2 teaspoon cinnamon 


Begin by creaming together the butter and sugar for the sponge base. When the butter and sugar are light and fluffy looking slowly add the egg. Then fold in the sieved flour/cinnamon and spoon the mix into a greased and lined 8" cake tin (preferably spring form).
Level out the cake mix and place the apples and blackberries on top.
Make the crumble mix by rubbing together the 
Bake in the oven (180c) for around an hour, though mine did take closer to an hour and a half. A skewer inserted into the middle (of the sponge) should come out clean.

Leave to cool in the tin and remove carefully. 

The simply pour over some delicious warm custard and enjoy! 


Proper home-made custard

Something that I've been meaning to attempt since long before this blog even started is making my own custard. I've just been waiting for the right moment to try it.
Finally with Autumn approaching and the whiff of crumble and pie in the air I felt that the time was right.

I used a simple, classic recipe for my custard. The only change I made to it was adding extra vanilla as at first taste I didn't feel that it had enough. Also, this doesn't make a really thick, rich custard. I will have a go at a different recipe for a richer custard soon, though I believe if you just add a touch more cornflour and/or an extra egg yolk that will do the trick.


  • Ingredients:

    570ml/1 pint milk
  • 55ml/2fl oz single cream
  • 1 vanilla pod or ½ tsp vanilla extract (I used 1tsp)
  • eggs, yolks only
  • 30g/1oz caster sugar
  • 2 level tsp cornflour


    Method:

    1. Bring the milk, cream and vanilla pod to simmering point slowly over a low heat.
    2. Remove the vanilla pod if using. 
    3. Whisk the yolks, sugar and cornflour together in a bowl until well blended.
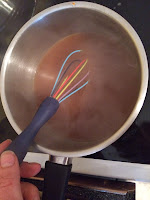
    4. Pour the hot milk and cream on to the eggs and sugar, whisking all the time with a balloon whisk.
    5. Return to the pan, (add vanilla extract if using) and over a low heat gently stir with a wooden spatula until thickened (it coats the back of the spoon without dripping straight off).
    6. Pour the custard into a jug and serve at once.
    7. To keep hot, stand the jug in a pan of hot water and cover the top with cling film to prevent skin forming.

      The main thing that goes wrong with custard making is the egg scrambling when the hot milk/cream is added. I managed to avert this by not having the mix get too hot at any point. 
      It does take time and patience to make your own custard but the sense of pride and satisfaction you get when serving it with a home made cake or pie makes it completely worth it. 

      Feel free to play with the flavours when you've mastered the technique, I made a second batch using all milk (semi skimmed) no cream to make it a bit healthier. Or you could go the other way and make it with all cream no milk. 


Tuesday, 8 October 2013

Knorr - A tasty short cut. Review.

Recently I was asked if I'd like to try some Knorr stockpots and gravy pots for review. I've been meaning to try them since they were launched but always gone for the cheaper supermarket own brand instead.

I honestly didn't think there would be much if any difference between supermarket own and Knorr so I was pleasantly surprised when it came to reviewing them.

I tend to use stockpots for loads of things, not just the usual such as for gravy or sauce but for going into my risotto's or cous cous (so much nicer than using plain boiling water).

I tried out the chicken stock pot in a Saffron risotto simply by making up a pint of chicken stock using the Knorr stockpot and adding a small pinch of Saffron to the stock, letting the flavours infuse together before adding to the Arborio rice.


A beautiful flavour combination! The chicken stock smells and tastes just like roast chicken, without the fuss of boiling the bones and reducing down the liquid. Bliss!

I then turned my attention to the vegetable stock cubes. I had roasted a large gammon joint which was being used to make many different meals. One of which was a 'diet friendly' Carbonara. I fried some sliced mushrooms in some Frylight (low cal cooking spray) and chucked in some of the sliced chopped gammon. Next I added 300ml of vegetable stock and simmered until the liquid had reduced by half.
The reason I added stock to my Carbonara was due to me using soft cheese spread in place of cream as is traditional which I find needs a little liquid to stop it becoming dry.
Next I added two egg yolks mixed with 200g extra light soft cheese and added some (cooked) pasta and garden peas.
Heat it all through until the egg is set and enjoy!


Also using the gammon roast, I made littlest baker a traditional roast gammon dinner and made up a gravy pot as a quick, tasty alternative to gravy granules (which I really prefer not to use if I can help it.) A roast dinner with the trimmings made quickly using micro steam veg pouches, my Airfryer for some of the best home roast potatoes I've had in years! and a Knorr gravy pot for the gravy. So simple yet so good!